
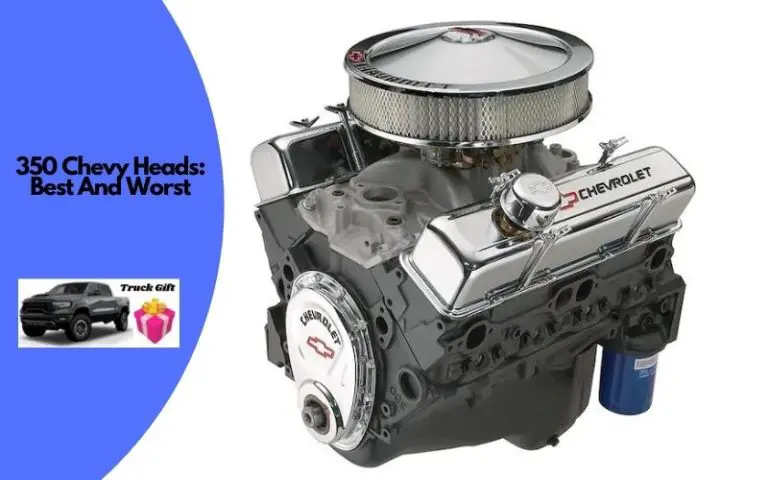
How To Adjust Valves On A Chevy 350? [8 Easy Steps]
The valves are placed in a part called the head in the engine of all vehicles. There are two types of valves. One type is responsible for letting fuel and/or air into the cylinder. These are called intake valves.
On the other hand, the combustion caused by the intake valves expels the exhaust from the cylinder. These are called exhaust valves. Sometimes the engine valves need to be adjusted. You need to know the accurate process before adjusting the valves.
So let’s find out how to adjust the valves on a Chevy 350, if you can adjust it yourself, and how much the process costs.
Reasons to Adjust Valves On A Chevy 350??
Before solving any problem, you should know its causes. Similarly, before adjusting the valves on a Chevy 350, you need to know exactly when and why you should do this.
Below are some reasons why you should adjust the valves on a Chevy 350.
Engine Idling
Engine idling occurs when there is a high vacuum pressure in the intake manifold due to the throttle valve being closed. Also, the high vacuum pressure pulls the oil from the engine head.
When you accelerate the vehicle, the eroded seal lets the oil go past. It goes through the valve guide. As a result, some of the time the exhaust burns out.
Cold Engine Test
A cold engine can be tested to see if your vehicle’s valve seals are defective and if they need to be adjusted.
After leaving your car outside overnight, you inspect the top of the cylinder head inside the valve cover. Then, you notice that it contains residual oil. It is a sign of a worn valve stem seal.
Again, when the engine is running, the residual oil is sucked into the combustion area by the bad seal, resulting in blue smoke coming out of the tailpipe. These symptoms mean you need to replace or adjust the valves.
Undue Oil Consumption
Excessive oil consumption of your vehicle may be due to a bad valve seal. In this case, you can use an oil dipstick.
It will help you to detect oil loss in the engine. If your oil burns faster than usual, it could be due to a leaking cylinder or excessive oil-burning.
If for any written reason there is no excess oil consumption, then it must be understood that excessive oil consumption is taking place due to a bad valve seal. In this case, an adjustment of the valve may be required.
Poor Engine Power
When you step on the gas paddle, you feel the lack of acceleration power and the faulty piston ring.
You can check compression to make sure the problem is caused by a valve seal or a piston ring.
First, remove the EFI fuse and crank the engine. And then use the compression gauge and check the results.
Off-Throttle Braking
You can be sure that the valve has a problem with throttle-braking when the accelerator pedal is stationary when descending from a steep downgrade.
If a high intake manifold vacuum has already been developed and the bottom of the engine is slanted, the oil may compile in front of the valve cover above the head.
In addition, when the accelerator is pushed after longshore, a large amount of burnt oil escapes from the tailpipe.
Undue Smoke
If your vehicle is producing excessive amounts of exhaust smoke, especially blue-and-white, and is prolonged after starting or accelerating the vehicle, this is a cause for question.
However, the smoke may disappear after a while. You might think that this is not a problem. Defective valves can signal the problem of excess oil burning. Then the piston rings and valve guides will cause excessive smoke production.
Can You Adjust Valves on a Chevy 350 Yourself?
If you choose to solve any kind of problem that is related to automobiles then it is very wise. It conserves both time and wealth.
When it comes to adjusting the valves on a Chevy 350, if you have a basic knowledge of the vehicle, you can do it yourself.
If the opposite is true, that is, if you do not have any knowledge of vehicles, then it is better to go to a skilled mechanic for any type of vehicle problem, not just this job.
How Much Time It Takes to Adjust Valves On A Chevy 350??
If you want to do the work yourself and get used to working with vehicle defects, it may take half an hour to an hour to adjust the valves on a Chevy 350.
On the other hand, if it is the first time, it will take some more time for you to adjust the valves on a Chevy 350.
Cost of Adjusting Valves On A Chevy 350?
You need to know how much it can cost to adjust the valves on a Chevy 350 before going to work. Valve adjustments can cost you approximately $200 to $350.
If you want to get the job done by a mechanic, you may have to pay him around $150 to $250 depending on the area. Lastly, the valve adjustment requires a variety of parts that range in price from $25 to $50.
How to Adjust Valves On A Chevy 350?
So, reader, let’s move on to our main goal step by step, that is, how to adjust the valves on a Chevy 350.
Step 1
First, warm up the engine. Then remove the valve cover.
Step 2
Now restart the engine. Then let it be inactive. Do the work as slowly as possible, otherwise, excess oil will spill around.
Step 3
Loosen an adjuster nut with a wrench until the lifter clicks. Go a little further, and loosen a little so that the lifter can be filled with oil. Slowly turn the nut down until the clack is reduced and finally closed.
Step 4
Take a further 1/4 turn even after closing. Then, go to the next valve.
Step 5
Repeat the same process for all 8 valves then go back. Turn them down to 1/4 more.
Step 6
Do this once more so that your lifters have a full 3/4 turn of pre-load. Sometimes, 5/8 turns are better than 3/4. So, go to the eighth part of a turn in the last go-around. Rehearse the procedure on the other side.
Step 7
Stock lifter settings are 1 full turn. The more loosely you place them, the better the top end. It will also help to keep the exhaust valves cool.
Step 8
Why did you take 1/4 turn at once? The reason is that it gave the lifter a possibility to stabilize. Otherwise, the engine will shut down if you try to crank a complete 5/8 or 3/4 turn at once.
FAQ’s
What is the best way to clean valves?
It’s important to have your Truck in top shape before you start adjusting these valves, since there will be dirt or grime that can interfere with this process. You’ll need an extension tool for these parts but just be careful not to use too much force if it might damage anything – then make sure you use pliers when necessary without at any point using gaps between them during installation so that nothing gets caught around any edges over time. This includes things like checking for leaks underneath and making sure all bolts are fastened correctly which would lead to serious issues in the near future if they’re left unchecked! Remember that compressed air might also come in handy during installation, especially if you find debris around plugs which could lead to more serious problems if they’re not dealt with swiftly.
How often should you adjust valve gaps?
If the valves are too close together or far apart, this can cause pressure in different parts of the engine which will eventually lead to even worse damage over time. So it’s important that these areas be cleaned out from dirt and grime so as to avoid mistakes when adjusting them – otherwise than things might get a lot worse! To rectify this problem use an extension tool for removing plugs (which may require extra strength) while using pliers without any gaps between them during installation so nothing gets caught around anything either. This includes checking for leaks under your Truck and making sure all bolts are fastened correctly properly since there would be serious issues in the immediate future if they’re not taken care of.
What can you do about a leaking valve?
If your Truck has been damaged by a leaky valve, then this will lead to some serious problems and require emergency attention quickly. This is typically caused when valves are too close together or far apart which causes pressure on different parts of the engine – leading to further damage over time! You need clean fluids so that dirt doesn’t get near these areas (especially during installation) as well as making sure no gaps exist between any pieces for safety reasons. The best way to fix this problem would be using an extension tool while also using pliers without gaps between them to avoid catching anything around bolts either. Make sure everything’s running smoothly before you do any adjustments, since there will be serious problems with things like leaks or other signs of wear if they’re not handled quickly.
What about the valve cap?
The valve caps are usually a little bit harder to locate and can sometimes get misplaced – so it’s important that these valves stay in top shape at all times! Checking for leaks under your Truck as well as making sure bolts are tightened properly is crucial because this would lead to more serious issues without proper care taken. You’ll need clean fluids when adjusting these parts and also remember never using gaps between pieces during installation either for safety reasons. The best way possible would be use an extension tool while also ensuring no gaps exist between pliers during installation which might end up catching anything around bolts. Remember to adjust the valves before any other part of your Truck, since there will be serious problems with leaks or other signs of wear if they aren’t handled swiftly.
What about adjusting valve gaps?
Adjusting these gaps is an important step in ensuring that engines don’t have too much pressure on one area – leading to even more damage! You’ll need clean fluids when doing this and also remember no working without a gap between pieces during installation either for safety reasons. The best way possible would be use an extension tool while also making sure no gaps exist between pliers during installation which might end up catching anything around bolts. Make sure everything’s running smoothly before you do any adjustments because that includes checking for leaks under your Truck as well as.
Conclusion
So these were all the procedures and information related to adjusting valves on a Chevy 350. You can successfully adjust the valves of your Chevy 350 by yourself by following the steps given above.
But always keep in mind that if you get stuck trying to fix any automobile related problem, you must seek professional help. Otherwise, there will be a huge loss and a lot of money will be spent.
Related Posts:
![How To Replace Door Hinges On Chevy Silverado? [In 3 Steps]](https://truckguidepro.com/wp-content/uploads/2021/07/How-To-Replace-Door-Hinges-On-Chevy-Silverado-768x480.jpg)
![How To Reset Speedometer On Chevy Silverado? [Step By Step]](https://truckguidepro.com/wp-content/uploads/2021/07/How-To-Reset-Speedometer-On-Chevy-Silverado-768x480.jpg)
![How Replace Fuel Lines On Chevy Silverado? [Easy Steps]](https://truckguidepro.com/wp-content/uploads/2021/08/How-To-Adjust-Valves-On-A-Chevy-350-1-768x480.jpg)