
6 Reasons Why F150 AC Works Intermittently [With Fixes]
Isn’t it annoying when you’re in your car and the AC temperature is going up and down? But you don’t know why it’s happening and you want to fix it.
So, your F150 AC works intermittently, why?
The reason your F150 AC works intermittently is because of 6 causes. The causes are low refrigerant level, problematic cycling switch, air temperature sensor, blend door actuator, blower motor, and long AC clutch gap. So, you need to match it with the refrigerant level and repair or replace any component.
Keep reading the article and you’ll get to learn more about the fixes in detail.
Why Does My F150 AC Works Intermittently?
Your F150 AC is working intermittently for 6 possible reasons. Take a look at the reasons and solutions below.
| Reasons | Solutions |
| Low levels of AC refrigerant charge | Evacuate the AC system and then recharge the refrigerant |
| Faulty cycling switch | Test the cycling switch if it’s damaged and replace it if it’s proven faulty |
| Excessive A/C clutch gap | Remove the shim to minimize the A/C clutch gap |
| Air temperature sensor not working properly | Reset the air temperature sensor |
| Damaged blend door actuator | Replace the blend door actuator with a new one |
| Faulty blower motor | Fix the corroded wiring, clean any blockage, and repair/replace broken internal components |
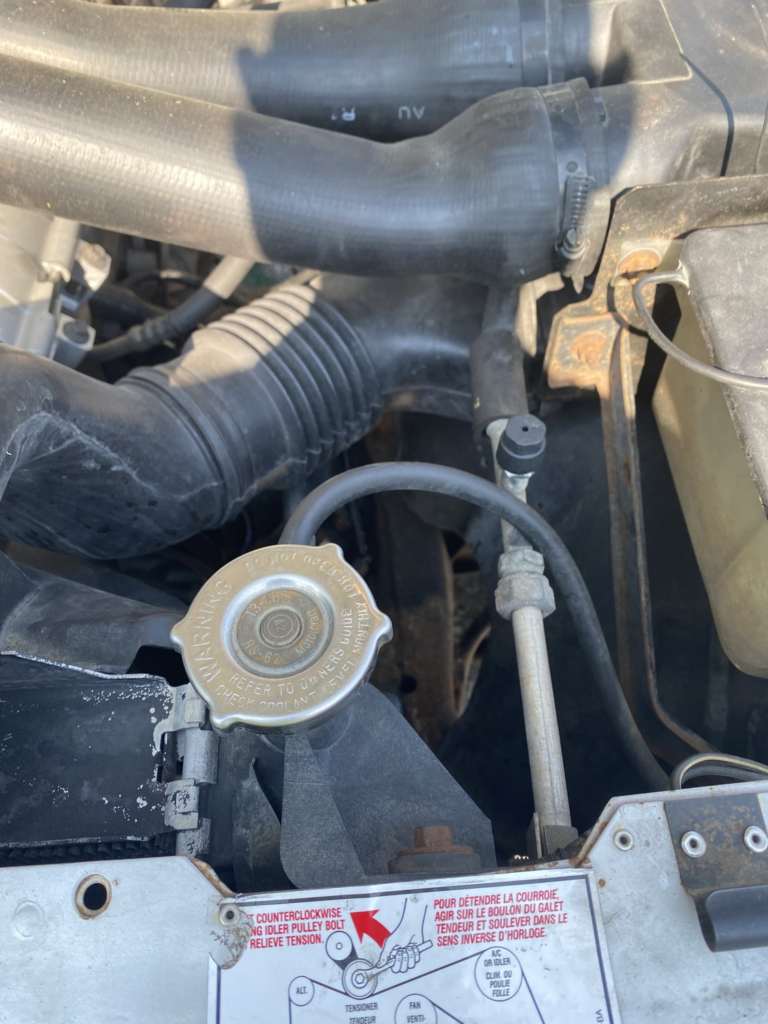
Reason 1: Low on Refrigerant Charge
When you notice the F150 AC is not cooling properly, it means there’s a leakage in the refrigerant charge and so the AC needs more refrigerant. The leakage issue also indicates that the AC is not charged or evacuated.
And this is the main reason that impacts the AC compressor – causing it to turn on and off intermittently. Moreover, if your AC compressor doesn’t work, the check engine light will also stop working in F150.
Solution:
To solve this you need to evacuate the car AC system, repair the leakage issue, and finally recharge the refrigerant to the appropriate level (29 oz.).
Here’s how you can evacuate the car AC system:
- First, you need to wear protective glasses and gloves. Then collect manifold gauges, a vacuum pump, an AC recovery unit, and a recovery tank.
- Then, open the valves of the recovery tank and release the nitrogen.
- After that, attach the vacuum pump to the recovery tank and remove all the air and moisture from the inside. Keep it as it is for an hour to completely vent out all the air and moisture from the tank.
- As soon as you have cleared all the air and moisture from the recovery tank, close the recovery tank valve. Make sure you have closed the vacuum pump as well.
- Next, you have to take the manifold gauges and connect them to your car. Make sure you connect the red manifold connector to the high-pressure side and the blue manifold connector to the low-pressure side.
- Then, you have to connect the hoses to the recovery unit.
- Finally, run an evacuation process for around 30 to 45 minutes. You can also run the evacuation process till the manifold gauges become zero.
As soon as the evacuation process is done, you should close all the disconnected manifold gauge connectors and open valves.
Tip: Make sure the vacuum pump is attached properly as a vacuum leak will result in grinding noise in your Ford F150.
Now, it’s time to recharge the refrigerant.
- First, open the refrigerant valve slowly.
- Then, check how much refrigerant the manufacturer allows to use in the car.
- After weighing the OEM-recommended refrigerant amount, you have to put the refrigerant in the AC system. Open the blue, low-pressure side. You’ll see the compression starting to work once the refrigerant is filled in.
- Finally, you have to turn off the ignition switch. Close all the internal valves on the side. The passenger air vents will feel cold.
Warning: Don’t open the side where the pressure is high for inserting the refrigerant. It’s only used for monitoring.
Reason 2: Faulty Cycling Switch
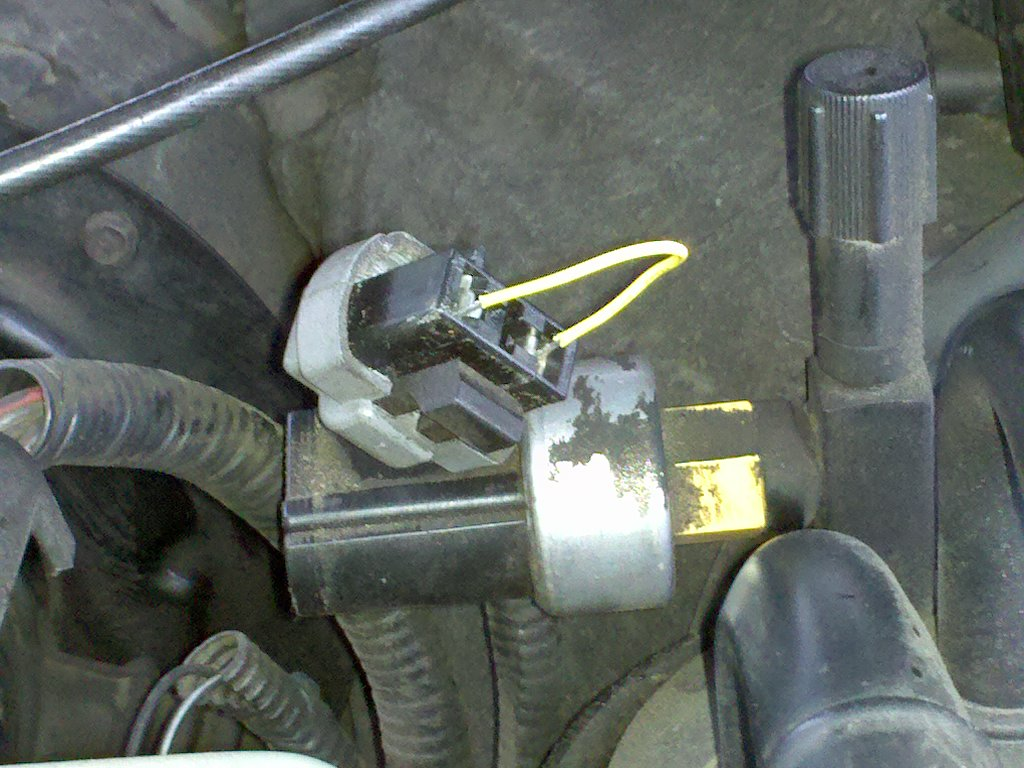
Another reason for the compressor clutch to not engage is the faulty low-side cycling switch. If it’s completely damaged, the compressor won’t engage.
Solution:
To solve the problem, first you have to test the AC cycling switch. Now, it’s a bit different from testing a Ford Multifunction switch. It’s more like a DIY method.
So, for this, you have to unplug the connector from the switch. Then, insert a straightened paper clip inside the harness connector. Keep it just the way it is for a few moments.
If you see the compressor is still not engaging, you should have to change the cycling switch.
Reason 3: Excessive Clutch Gap
Another reason for the F150 AC to work intermittently is when the clutch gap is more than usual. It becomes hard for the compressor to engage. As a result, the AC doesn’t cool properly.
Solution:
So, first you have to measure the clutch gap. If you notice the gap is more than the required amount (.013 to .033), you have to remove the shim.
For this, you first need to take out the bolts from the compressor. Then, place the new shims and make sure they maintain the required gap mentioned. After that, place the bolts back using a wrench. Finally, test if the compressor engages again.
Reason 4: Faulty Air Temperature Sensor
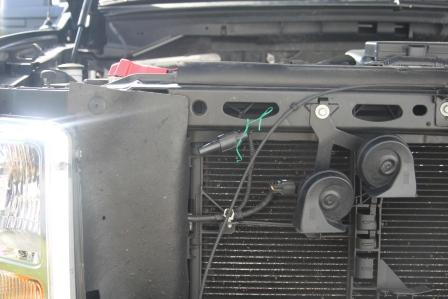
When the air temperature sensor is damaged or broken, it fails to send the message to the vehicle’s automatic climate control system.
As a result, the system can’t decide what the optimal temperature should be inside the car. So, the AC starts working intermittently.
Solution:
To fix the malfunctioning issue, you have to reset the ambient temperature sensor in your Ford F150. Here are the steps you need to follow.
- First, you have to start up the engine and activate the ambient temperature sensor.
- Then, shift the gear to Drive mode. Make sure the parking brake or e-brake is engaged in this case. It’ll help your car to stay steady even when the gear is shifted to move the car forward.
- Finally, press the AC and the Air Circulating buttons simultaneously for 2 seconds at least. Then, release the buttons and wait for a few minutes for the sensor to calibrate fully.
Tip: If you don’t know what an Air Circulating button looks like, just look for a button with a car picture on it. There’s also an arrow sign on the button which signifies air circulating cabin.
Well, if you need to manually reset the AC sensor in the Ford F150, here’s what you have to do.
- First, you have to turn off the ignition and disconnect the batteries. Use a wrench to power off the battery.
- Then, locate the ambient temperature sensor. Usually, it’s situated on the passenger side.
- After finding the sensors, press on the small lock that has wires connected to the sensors. Then, gently pull out the wires. It’ll disconnect the sensor’s wiring.
- Finally, you have to adjust the dial to the maximum temperature. Then, reconnect the wiring just as the sensor’s wires were before.
This is how you reset the AC sensor in the Ford F150.
Reason 5: Broken Blend Door Actuator
Sometimes the internal temperature of the car isn’t appropriate because the blend door actuator isn’t working. It might be damaged or broken.
Solution:
You need to replace the blend door actuator. It’s better to consult a technician for replacing the blend door actuator. But if you want to replace it yourself, follow the steps below.
- First, disconnect the negative battery wire from your Ford F150.
- Then, pull the glove box out gently and disengage it from the knobs. Empty the glove box and keep the components aside.
- After that, disconnect the wiring harness behind the glove box. Simply, pull it out from the socket.
- Then, take out the air filter assembly and the 8mm bolts in the HVAC area behind the glove box. It’ll give you access to the blend door actuator. Carefully, pull back the HVAC assembly and disengage it from the metal clips. Be careful not to damage any of the clips or else it’ll ruin the entire AC system.
- Finally, locate the blend door actuator and carefully replace it with a new one. All you have to do is pull out the wires one by one and connect them with the new actuator as it was before.
Reason 6: Problematic Blower Motor
As the blower motor is one of the core components of a car AC system, a faulty blower motor will cause temperature issues. If the blower motor has a loose connection, debris inside, any sign of damage, or worn-out components, the AC will work intermittently.
Here’s a helpful YouTube video on how to test a problematic blower motor in your vehicle.
Solution:
To solve this issue, you have to first diagnose the cause properly. Here are the few things you need to check and fix (if needed).
- First, inspect the wiring connections. Make sure they are secured enough to provide proper connections. If the fuse is blown, replace the fuse.
- Then, check if there’s any dirt or debris clogging the system. Take a soft brush and clean the blockages thoroughly. Run some compressed air to make the vents clear.
- Finally, identify if any of the internal components are broken or damaged. Replace those parts to fix this issue.
Frequently Asked Questions (FAQs):
What are the symptoms of an overcharged car AC system?
The major symptoms of an overcharged car AC is compressor malfunctioning and a failing engine. You’ll notice that the compressor is making excessive noise. The cooling or hot air is also inadequate. Moreover, you’ll notice a high-pressure reading.
Can car AC reset itself?
No, car AC can not reset itself. If your car AC is resetting on its own, this means there’s an internal problem. It means either the circuit fuse is blown or the battery gets disconnected every time.
How do you diagnose the wrong car AC?
To diagnose a wrong car AC, you should identify if the main components are in a proper way. These components are compressor, condenser, evaporator, metering device, hoses or lines, and refrigerant level. A failure of these components will result in intermittent air temperature in the car.
Final Words
Hopefully, you’re now aware why the F150 AC works intermittently. By following this article, you’ll be able to solve the problems with step-by-step instructions.
Make sure you’re careful while replacing or repairing any component as the car AC system is a bit delicate. Best of luck!
![Cam Phaser Lockout Without Tune [Clarified!]](https://truckguidepro.com/wp-content/uploads/2023/03/cam-phaser-lockout-without-tune.png)
![5 Reasons Why F150 Sunroof Won’t Close [With Solutions!]](https://truckguidepro.com/wp-content/uploads/2023/01/f150-sunroof-wont-close.webp)
![How To Check Ford Focus Transmission Fluid? [5 Easy Steps]](https://truckguidepro.com/wp-content/uploads/2021/08/How-To-Check-Ford-Focus-Transmission-Fluid-768x480.jpg)

![F150 Ticking Noise When Cold [Explained & Fixed!]](https://truckguidepro.com/wp-content/uploads/2023/03/f150-ticking-noise-when-cold.png)